Finding & Creating Interesting Light
Ask any photographer what they believe the most important element of a photograph is, and you’ll likely get an array of responses. Some might say compelling composition, raw emotion, or sharp focus, just to name a few.
One universal truth – the right light (or lack thereof) can make or break a photograph. Luckily for us, we can find great light (for free!) in nature. And if nature happens to be super uncooperative, we can also create beautiful light through the usage of off-camera flash techniques.
The coveted golden hour

Shooting during the golden hour (the small chunk of time just before sunset) is preferable to a lot of photographers – and for good reason. The light takes a gorgeous golden tone, softens contrast, and can look really beautiful as a backlight for your subjects.

It can also be easily used as a diffused key (front) light on your subjects if the location doesn’t allow you to shoot into the sun. This can be a great way to capture clouds or a really pretty sky in the background (which is difficult to do without the use of flash when you’re turned the other way and shooting into the sun).
Try JPEGmini Pro For Free Now!
Turn around (literally)

Shade is your friend

When shooting outdoors, in full sun, the shade can be your best friend. This doesn’t necessarily mean you have to find a forest – I’ve used driveways between buildings, tunnel entrances. Shade with small pockets of light can be really gorgeous if the sun is low enough in the sky. In the photo above, it was still a good two hours before sunset. If it had been much earlier in the day, the light would be more dappled on their skin and clothing, which wasn’t the look we were after.
Embrace overcast days

Overcast days are easily a favorite of mine. The sky acts like one giant soft-box, and with the right posing and direction, the ever dreaded under-eye-shadows can be avoided with little to no flash at all.
Put a flash behind your subjects for a little ‘pop’

Flash can be used to recreate natural light or to add more drama to an image. In the photo above, I wanted to attempt something more dramatic, while capturing the incoming rainstorm in the background. We used two flashes for this look – one speed light behind them, on a stand, about 4 feet tall, shining directly at them from about 10 feet back. There was another bare-speed light in the last horse-stall on the right. This flash was extended to around 7 feet tall, angled down toward the woman’s face.

Find the best window light
Not all window light is created equal. Your end results depend on the direction the window faces, time of day). The photo above was taken midday, with soft, diffused light peeking through the window.
Fancy it up
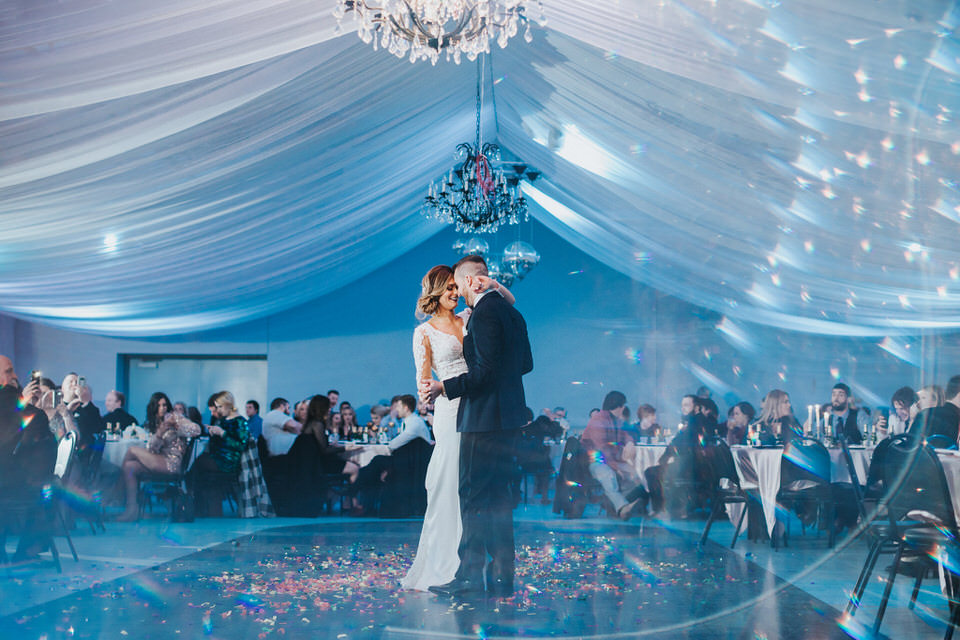
When you start to produce consistent images with both flash and natural light, it might be time to bump it up a notch! There are all kinds of fun and popular things to experiment shooting through – from chandelier rings (pictured above), copper pipes, prisms, to pieces of tulle or simple Ziploc bags. The image above was shot using two flashes (one to the back left, pointing toward the middle of the dance floor, the other to my near left, also pointing toward the middle of the dance floor). I wanted to be sure to shoot somewhat into one of the lights to get the sparkles with the chandelier ring I was using. Without that backlight source, the ring gives a fuzzier effect, instead of a sparkling one.


