Street photography has gained quite a bit of traction in recent years, no doubt in part due to the ease of access that came with photography going digital. Now you don’t need expensive gear and other equipment; you can get started with just your phone camera.
While there is a lot of noise out there online when it comes to street photography, the ease of access has also democratized the genre, meaning there are creatives putting out great work that we might not have gotten to see otherwise.
You could be one of them so hopefully, these street photography tips for beginners will help give you the push you need to get started on this journey.
1) Put the Doritos down and get off the couch
This is mostly directed at my fellow Americans, but with the technology we have today, I’m sure folks all around the world are living a more and more sedentary lifestyle. Our computers and smartphones make it so the world is at our fingertips. We can get lost in the never-ending Netflix queues and Facebook/Twitter/Instagram feeds.
While these things connect and inform us, they can be an impediment to our personal and collective growth if we let them consume too much of our time.
Breaking habits is never an easy thing for anyone, but in the case of being more active and using your time to shoot street photography is extremely rewarding. It’s like ripping a band-aid off; if you haven’t been all that active lately and you go out for the first time to shoot street photography and walk a few miles, you’re going to feel the burn at first.
Once you start doing the extended walking associated with doing street photography, however, you become accustomed to it and even crave it. After all, exercising and staying active have shown to actually increase energy and productivity (and even make you happier and smarter).
2) Go where the action is at
I think a majority of street photographers find street photos with people in them to be more interesting. With that being said, urban landscapes have their place as well.
But if you want to shoot street photography with people in them, you make it a whole lot easier on yourself if you go to crowded, downtown areas. Downtown city centers are where you’ll encounter the largest number of people to include in your photos.
It’s not guaranteed by any means that you’ll take your best street photos in these areas, but it’s a good place to start because of the number of people you’ll cross paths with and people in these areas usually pay you and your camera less attention because it’s not as obvious as to what you’re photographing. You can absolutely do street photography in less populated areas, but you’ll have fewer opportunities to include people in your frames.
By shooting in more populated areas when you’re just starting out, you get a much easier opportunity to photograph scenes with people in them and that can reduce some anxieties that come with doing street photography and give you a bit of confidence moving forward.
3) Use whatever camera you’ve got
One of the great things about street photography is how accessible it is. If you shoot wedding photography, portraits, landscapes or if you’re just an all-around photo enthusiast, you probably already have a camera more than capable of shooting street photography.
Street photography is one of the few genres of photography in which image quality is not much of a concern. And of course, there are probably some who even prefer their image quality to be a bit on the sketchy side to give it more of a street feel.
But say you have a cheap DSLR or some old film camera, that is plenty to get started. I did my first street photography sessions with a DSLR. I wasn’t a fan of the obvious size and the loud shutter sound so I quickly switched over to a much smaller camera but it got the job done.
The camera that I ended up switching to, and still use to this day (the Ricoh GR) is actually a bit of a downgrade in terms of technology compared to the DSLR I was using. But it is much smaller, unobtrusive, lighter and even cheaper than what I was using before. You don’t have to break the bank to do this.
If you’re interested in this camera, I reviewed it here.
You can even use the camera on your phone and get great results. I would actually use my iPhone over a big bulky expensive camera any day for street photography.
At the end of the day though, I recommend something small and unobtrusive like the Ricoh GR or Fuji x70. High-quality point-and-shoot cameras like this are small enough to fit in a front pants pocket but big enough to house relatively large APS-C sensors, something phone cameras aren’t able to do.
4) Use a 35mm or 28mm lens
A lot of the great street photographers shoot with wide angle lenses, 35mm probably being the most common. The reason being is it just works well.
There’s something to be said for 35mm being a useful focal length across all types of photography because it’s a close field of view of what the human eye naturally sees. But I think a more relevant reason for using a 35 or 28mm lens in street photography is because it shows the intimacy of the street.
Street photography shows how people navigate public and shared spaces, often times in close quarters. By using a wide angle lens for street photography, you get to show people what it was like when you were there.
Shooting with wide angle lenses means a lot of the time you have to get up close to your subjects so that you can see people’s’ expressions and gestures. It may cause you anxiety or fear, but it’s something you can get over with time and practice.
This isn’t to say you can’t use a longer lens for street photography. I’ve actually seen some street photography with longer lenses done very well.
But for the most part, you lose that sense of intimacy with a telephoto lens. Not only that, but the compression from the field of view makes it obvious that it was shot from a long ways away, which, there’s no other way of stating it, gives off a pervert or sniper impression.
5) It’s OK to do short street photography sessions at first
The first couple times you go out for a street photography session, you might feel like tucking your tail between your legs and going home after just a few snaps. And honestly, I think that’s ok.
It can be intimidating including strangers in your photos at first. I think the main issue stems from the anxiety of and not knowing what someone might do if you take their picture.
They could react in a thousand different ways. They could ask you what you’re up to. They could get angry or get confrontational with you. Or they could pay you no mind and do nothing at all.
The last possibility is by far the most likely one and it’s very unlikely that you’ll encounter any serious issues while out shooting in the streets. But you won’t internalize that unless you go out and confirm that for yourself by doing street photography.
Regardless, it’s perfectly fine to ease yourself into it by shooting shorter sessions at first.
Try JPEGmini Pro For Free Now!
6) Avoid the “run and gun” style
I don’t know if anyone else uses this term for street photography, but by “run and gun”, I mean just walk down the sidewalk and take pictures of the people passing you by in the opposite direction. This was what I did when I first started doing street photography, and I wondered why I would come home with so few photos worth keeping.
I believe that shooting in this style was the reason.
If you’re walking and shooting at the same time, you’re far less likely to frame things the way you want them. It’s harder to space out the subjects in your frame the way you want them. Plus, you have very little say over what you include in your background doing it this way.
The look that comes from this style often times comes across as unintentional. This aesthetic tends to look haphazard and not thoughtful.
A typical result is characterized by the sides of people’s heads and cluttered backgrounds. That’s not to say that it can’t work, but I think you end up with less interesting photos and a lower keeper rate. I think it’s fine to make an exception for when you see an interesting subject crossing paths with you; the one recommendation I would make in these instances is to turn and shoot towards the storefronts and not straight-on or towards the street, as you end up with far more cluttered backgrounds this way.
I do have some shots that I consider keepers from back when this was my style, for example, this photo:
7) Photograph single subjects
Single subject street photographs can be very compelling when done well. They’re also technically easier to compose(but not necessarily to compose well) because with single subjects you’re just dealing with one subject and a background. You don’t have to think about spacing subjects out within your frame or about overlapping subjects(although that’s not to say you should just place a single subject in your frame willy-nilly and expect to compose a masterpiece).
When photographing single subjects, the first instinct is to frame them in the most obvious ways; by putting the subject in the middle of the frame and either include their whole body or their face, usually straight-on. It works when done right, but you can also frame a single subject in a myriad of different ways than this. You can photograph just one arm of a person poking out behind a sign, you can photograph just a person’s feet from a low angle(don’t get pervy with this one, please), or you can photograph a person carrying something that obstructs most or all of their body from view.
The point is to consider some ways of seeing things from a unique point of view.
But don’t get down on yourself if you’re not inspired to shoot things from unique angles at first. You don’t have to reinvent the wheel here.
The real takeaway is to get comfortable making images that include people on the street.
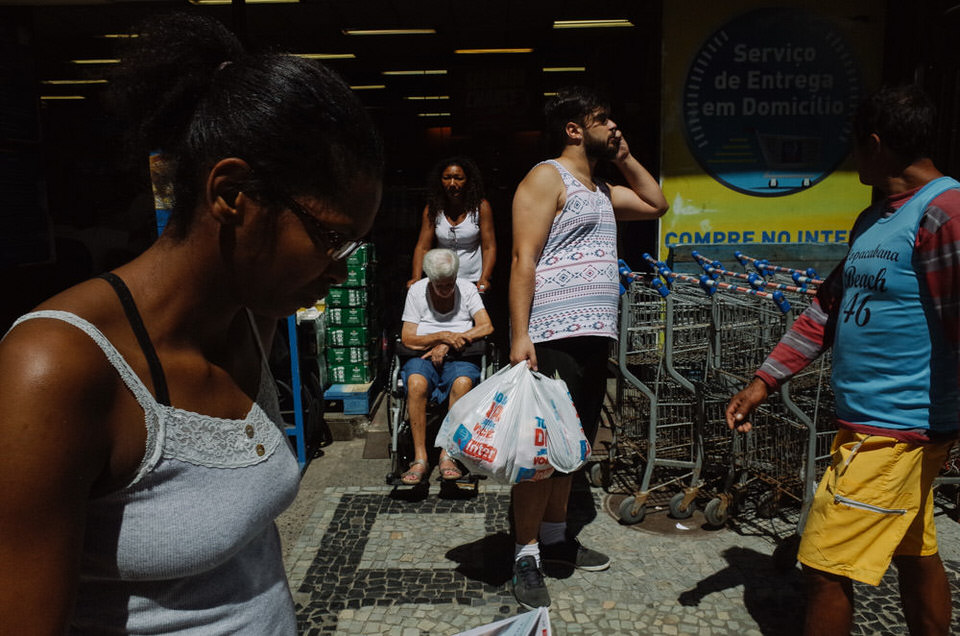
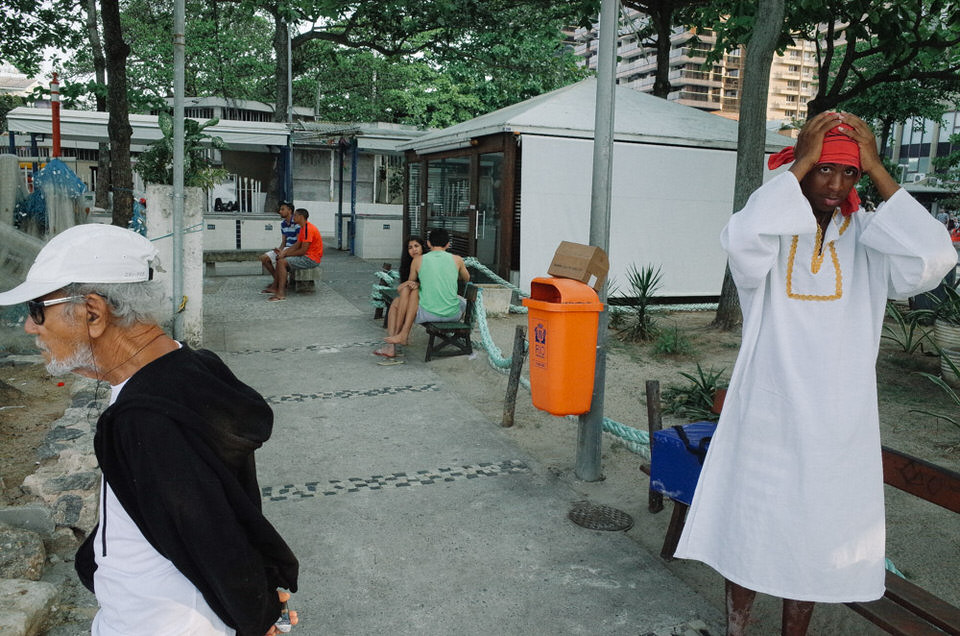
8) Use “anchor subjects”
By “anchor subjects”, I mean find stationary subjects, so basically people who are in a public environment and sitting or standing still. From there, you position this subject somewhere within your frame, then pay attention to other subjects within your frame and take exposures when your secondary subjects are doing something interesting, are positioned in a way you find creative, or just spaced out throughout the frame in a way that looks nice.
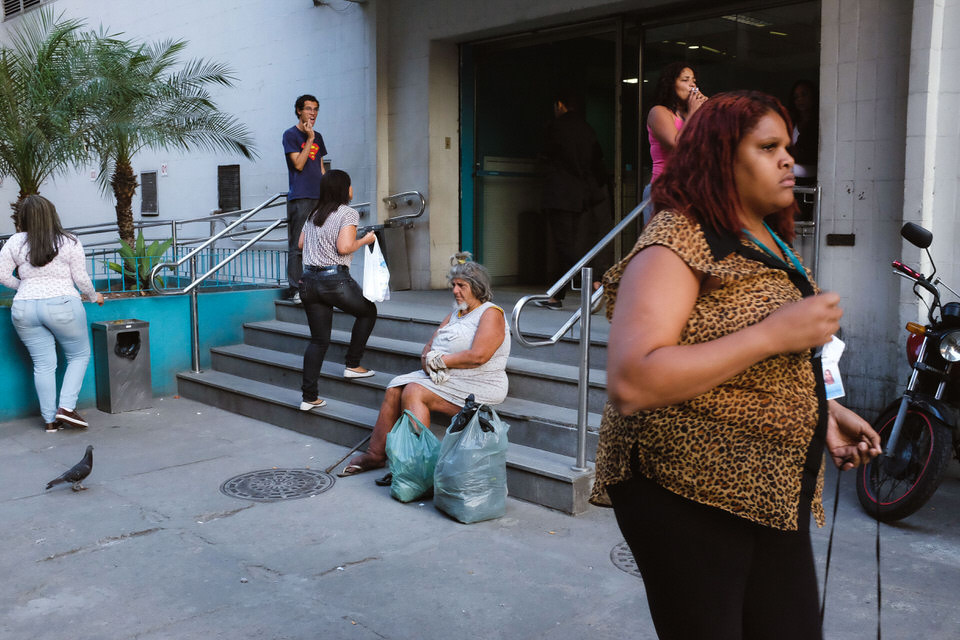
Your anchor subject(s) can be placed however you want them; whether that be in the foreground, middle-ground, background, or even smack dab in the middle of the frame. Anchor subjects don’t have to be people either; an anchor subject could be a sign, a light pole, an animal or anything really.
This is probably the one technique that inspires me the most in street photography. You start out knowing you’ll have an interesting subject in one of your layers and you work from there to add other interesting subjects or interactions just by waiting for other subjects to move within the frame and shifting your perspective.
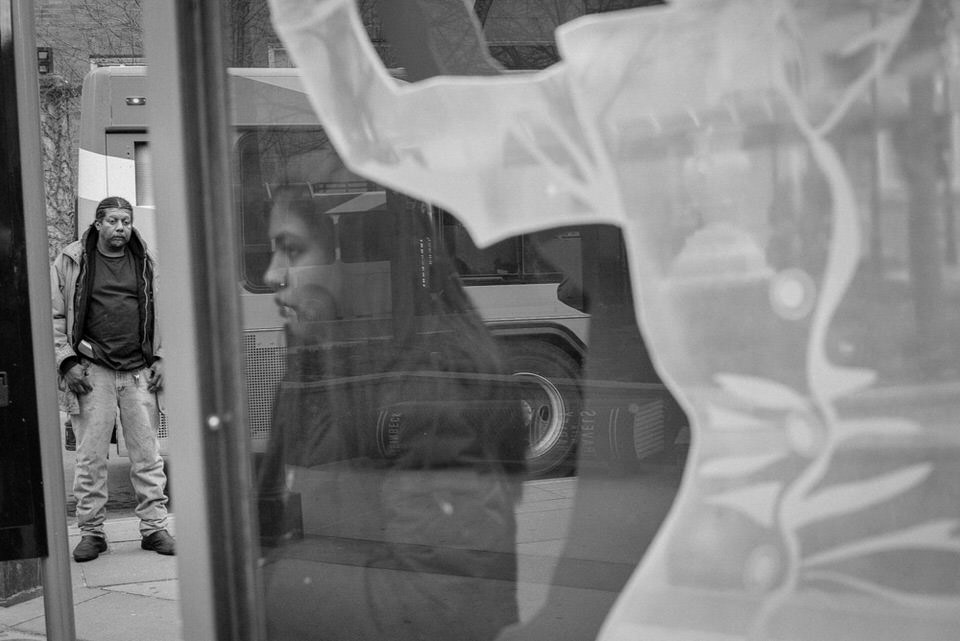
9) Shoot towards storefronts
In street photography, you spend a lot of time on sidewalks, and you have a few options:
1) Angle your camera towards the street with subjects in the foreground.
2) Angle your camera down the sidewalk/in the direction of the street.
3) Angle yourself towards storefronts.
In my opinion, photographing towards storefronts is the superior option. When shooting either into the street or longways down the street, you have much less control over your background and often times you end up with a cluttered mess of cars, overlapping pedestrians, street signs etc.
By photographing towards the storefronts, you get to have more control over what’s included in your frame, your shots look more intentional, and I think it just generally looks better to have your background closer.
10) Think as little about your camera settings as possible
One of my personal favorite ways to shoot is in Ricoh’s Tav mode. It’s essentially ISO priority mode, meaning you choose the aperture and shutter speed(in good light I like mine set to f/8 and 1/500s shutter speed) and the camera chooses the ISO for you.
I think Tav mode is only found in Ricoh/Pentax cameras but there are other ways to do it on other camera brands; they just don’t call it Tav. On Fuji cameras, for example, you can set your aperture and shutter speed manually and set the ISO to automatic, which is the same thing.
I also use aperture priority in bright lighting if I think the camera will be choosing a very fast shutter speed. When the sun is setting and the light is waning, sometimes I’ll use shutter priority mode and set the camera to the slowest shutter speed that will give me minimal motion blur so I don’t have to be constantly making adjustments to my aperture and ISO.
If I feel like I’m going to have to make fewer adjustments on the fly by using manual mode, like when I’m shooting in particularly dark environments, I’ll do that.
That may sound like a lot to think about, but I’m really just talking about picking a mode and setting it and forgetting it for an extended time frame until lighting conditions change to the point where you might need to consider something different. Once I choose a mode, I don’t want to be thinking about it much again, unless I notice I’m not getting proper exposures.
I’m much more concerned with finding a good light to shoot in and framing my compositions than I am with my camera settings. It’s perfectly fine to shoot in P mode too—it’s about the art, not about the tool used to create it.
11) Pre-focus your lens
Also referred to as ‘zone focusing’, this essentially means setting your focus distance to a predetermined distance(I prefer to have mine set to a meter) and leaving it there. Couple this with an aperture of f/8 or smaller and everything a meter away from you and past that will be in focus.
The longer the lens you use, the further back you will have to set it but a meter away works well with wider lenses like 35mm and 28mm lenses.
By doing this you miss fewer shots because you’re always focused at a distance that is going to get the majority of the frame in focus. The alternatives are to manually focus, which means focusing back and forth constantly or to use autofocus, which can work but can result in the lens hunting and not locking on fast enough, especially in low light. Neither are as efficient as just prefocusing and having pretty much everything already in focus for the most part.
12) Photograph People’s Faces, Not Their Backs
If you look through the photographs of the great street photographers from the early days of the genre until now, you’ll notice that a good deal of the ones containing human subjects shows their faces. You can see the humanity in people by viewing their faces; it allows you to speculate what they’re thinking about, what type of mood they were in when it was shot, their hopes, anxieties, anger, and desires. Maybe they feel nothing.
But you can’t get these glimpses into people’s souls when all you can see is their backs. It just doesn’t give you any information.
Go to where amateur street photographers present their work and you’ll notice a lot more photos showcasing the back of people’s heads than you’ll find with the pros.
13) Shoot With Smaller Apertures
With some types of photography, it’s all about the bokeh and getting that razor-thin depth of field. Not so in street photography.
Street photography shows subjects and their surroundings on the street. The key point here is subjects and their surroundings, meaning you want to show people and how they interact with the world around them.
Blowing out the background may work in many types of photography, but in street photography that context in the background is important.
14) Look for good light
In landscape photography, it’s all about the golden hour when the sun is either rising or setting. It could be argued that those are the best times to shoot street photography as well.
You can find great pockets of light during the golden hour where you get really great dramatic lighting with deep shadows on your subjects. Or you may find instances where a single subject is illuminated with really beautiful sunlight but other subjects within the frame are partially obscured by shadows, which when done right produce some of the best street photography results.
However, I don’t think you have to limit yourself to just shooting during the golden hour, for a few reasons. For one, this is street photography; the goal is not to create postcard images. Even ugly, harsh light is perfectly fine to shoot in. That’s real life.
Two, due to the positioning of buildings relative to the sun and the shadows they cast, you can find pockets of light that have been diffused by buildings and other manmade things and that contrast with areas of shadow. In other words, during the daytime (other than just golden hour), you can find lighting that looks somewhat similar to golden hour lighting even though it’s not.
Lastly, lighting isn’t the be-all end-all of street photography. Good composition can overcome bad lighting.
15) Shoot in color
Early street photographers shot in color because they had to and it was their only option, not necessarily because it was their preference. Granted, some of them looked down upon photographers who switched over to color film when it became available and regarded them as substandard artists not to be taken seriously.
But I think this was a reactionary backlash rather than a rational, well-thought-out critique on where photography was going at the time.
Even though I think that black and white can have its place in modern street photography, I think you miss out on the visual richness of life by converting photos to black and white. We see in color, so why should we eliminate all that tonal complexity and convert things to black and white?
Choosing to convert street photography photos to black and white is a creative decision, and that is ultimately up to you as the photographer. But I want my creative decisions to be mostly focused on how I frame my images.
16) You can salvage bad exposures by converting to black and white
A bit contrary to what I was just discussing, but if you have a really nicely framed photograph but you bombed the exposure, converting to black and white can help save it.
17) Shooting documentary-style when not in the street will help your street photography
This is something I noticed from shooting wedding photography, some events like birthday parties and just taking my camera along when hanging out with friends. By shooting documentary-style in these settings, you can get a lot of practice that will train your eye for the streets.
The great thing too is that when photographing events where it clearly looks like you’re paid to be there to document it, people seem to pay you less attention. This can help you get comfortable photographing in the manner that street photography requires.
Doing this can seriously help with your framing.
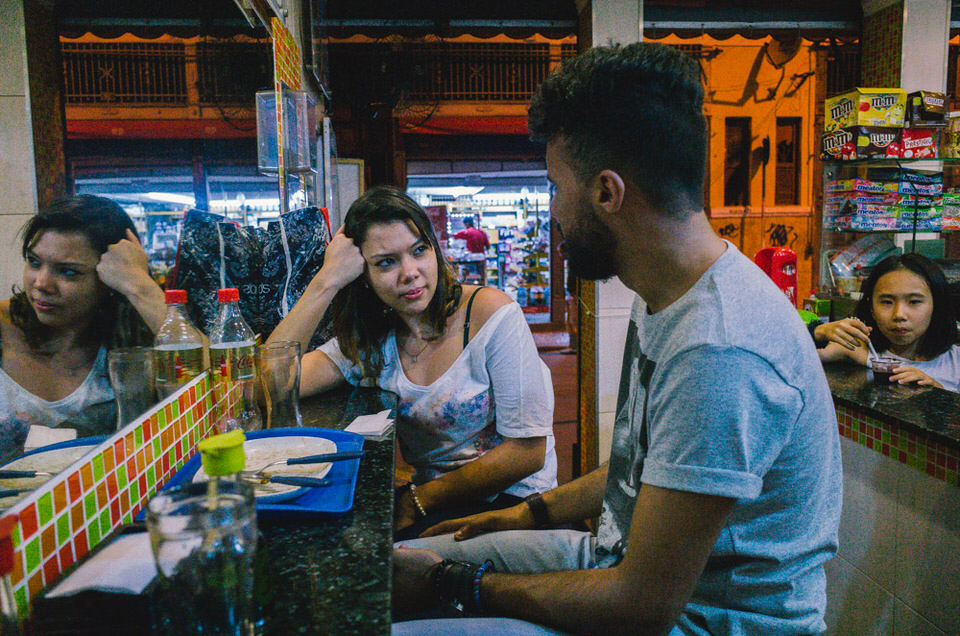
18) Stay in one place and let subjects walk into your frame
This is an effective technique for street photographers of all skill levels, but particularly for when you’re starting out. The reason being is that you don’t have to walk up to people and start firing away; you find an interesting background to be in your frame and then people walk in and out of it.
It eliminates the feeling of invading people’s personal space—they’re walking into an area you’re already pointing your camera at after all.
This takes some patience but can yield some really nice results.
20) Space your subjects out
When you’re framing multi-subject compositions, aim to have your subjects spread somewhat evenly through the frame. This adds a compositional balance that is more pleasing to the eye than if you allow for too much overlap among the subjects in a given frame.
It’s for this reason that I’m actually usually paying more attention to the corners of my frames to ensure that things are spaced out nicely.
This is probably one of the most difficult aspects of coming away with keepers in street photography. Even the great Alex Webb has said that 99.9% of street photography is a failure, so it’s important to not get too discouraged if you’re not coming away with great images all the time. Not to mention this is a visual skill that takes time and continuous practice to develop.
21) Always have a camera on you
We don’t all have the luxury of being able to set aside time every day to go out into the streets and shoot street photography. But that doesn’t mean you can’t carve out a chunk of time in your everyday life to dedicate to street photography.
You can photograph after getting off the bus/subway on your way to work. You can photograph on your lunch break. Or you can shoot after you get off work before you go home for the day.
And the smaller your camera, the more likely you are to take it with you. That’s why I’m such a big fan of the Ricoh GR, because I can take it everywhere with me and it fits in a front jeans pocket when I’m not using it.
There’s always the option of using your cell phone camera as well.
22) Set time aside just for street photography
I touched on this briefly before but I think it’s worth mentioning that if you can find the time or adjust your schedule, I think it’s a good idea to set time aside purely for street photography. I find it a much more comfortable and productive way to shoot rather than working it into your commute or whatever.
You don’t have to pay such close attention to arriving on time somewhere so you’re free to wander, get lost and get in the zone.
23) Take cues from the masters of street photography
Musicians look up to their favorite bands and performers when learning their craft. The same thing goes for painters: they study the greats like Picasso, da Vinci, van Gogh and Michelangelo.
So it makes sense for aspiring street photographers to take a look through the amazing body of work that street photographers have produced over the course of the genre’s relatively brief history. Just looking at the work of accomplished street photographers will make you a better street photographer by giving you a glimpse into their thought process. You’ll get a feel for what light they look for and what makes a good composition.
There have been loads of great street photographers since the inception of the genre but a few street photographers that I recommend checking out include Alex Webb, David Alan Harvey, Robert Frank and William Eggleston.
On a related note, it’s also really beneficial in developing your eye to appreciate works of other types of visual arts. You can gain inspiration from painters, sculptors, from films and even graphic designers. It’s all related.
24) Smile and say “thank you” if someone notices
People get caught off guard and will notice you photographing them sometimes. If they do and give you an odd look, smiling and saying “thanks” is usually enough to diffuse the situation and you can move on.
If you do get asked as to what you’re doing, I just recommend staying as calm and polite as possible and getting on to the next interesting picture.
25) Know your rights
If for whatever reason someone does get confrontational with you on the street, it’s helpful to know the laws governing street photography in whatever country you’re in. For the most part, street photography is completely legal in public spaces in the majority of countries.
However, that doesn’t mean you should flaunt your knowledge of the law just for the sake of it. For instance, if you take a picture of a person and they get upset, it may be in your best interest to delete the photo rather than proclaiming you know the law and therefore will keep it. It’s best to keep a level head, use your discretion, and be respectful even if someone is not showing you the same level of respect.
Sometimes it’s best to just take the course of action that will avoid any type of prolonged confrontation.
26) The less gear, the better
I used to have a mild case of GAS(Gear Acquisition Syndrome) but keep it super simple now. Bringing a bunch of photo gear with you is just counterproductive in street photography.
The more stuff you have with you the less enjoyable it is to be out and walking around. Also, the bigger the camera you have, the less likely you are to bring it out with you when you’re going out without the specific intention of shooting street photography.
My street photography gear now consists of a very compact camera, a couple extra batteries and maybe an extra SD card. I don’t bring a bag, flashes or any other gadgets that would weigh me down.
27) Your choice of footwear is almost as important as your camera
Street photography consists of a whole lot of walking. So I recommend keeping it casual and comfortable. Some nice inserts can help as well.
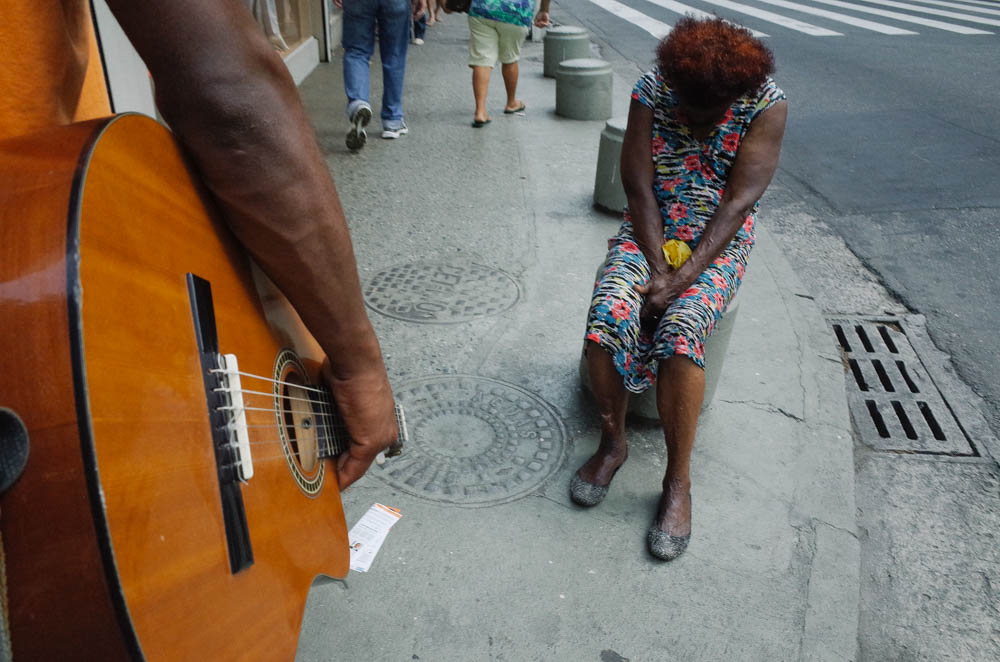
28) Get close
Legendary Magnum war photographer Robert Capa famously said: “if your photographs aren’t good enough, you’re not close enough.” He lived by that mantra because it works.
Photographing your subjects at a close distance usually tells a more intimate story than the alternatives.
29) Shoot from far away (with intention)
There are also plenty of reasons to shoot something at a distance. But as with shooting up-close, you should shoot from a distance for a reason (which could be as simple as your instincts telling you to do so) rather than just clicking the shutter button without putting any thought into it.
When shooting from a long distance, you still need to pay attention to make a clean composition just as you would when shooting at a close distance. In some respects, shooting from far away can be even more difficult than shooting up-close because there’s more chance of overlapping subjects and having a messy background.
30) De-clutter your frames
In crowded public spaces, it’s easy to end up with compositions that are complete chaos. Too many subjects, backgrounds too far away, or too many layers can all make for uninteresting photos because they lack a central focus.
Some ways to avoid this issue include limiting the number of subjects you include in your frame(and also spacing them out throughout the frame), using a defined background(i.e a somewhat close building and not a background that is miles away), and being able to admit when a photo is too messy in the editing process to be considered a keeper photo.
31) Don’t worry about perfect image quality
The optimal word is street photography. The concept of the street invokes thoughts of a place that can be dirty, grimy, possibly sketchy, and disorganized.
So there’s no obligation to take places like this and try to make them look pristine or into something they’re not. I’m not saying you should purposely make your image quality be garbage(I actually want the sharpest and detailed image quality I can get for whatever camera I’m using), but there’s really just no reason to obsess over it.
People have been using smartphone cameras for 5+ years now, and while it’s not my preference, there’s nothing wrong it and is perfectly adequate for the most part.
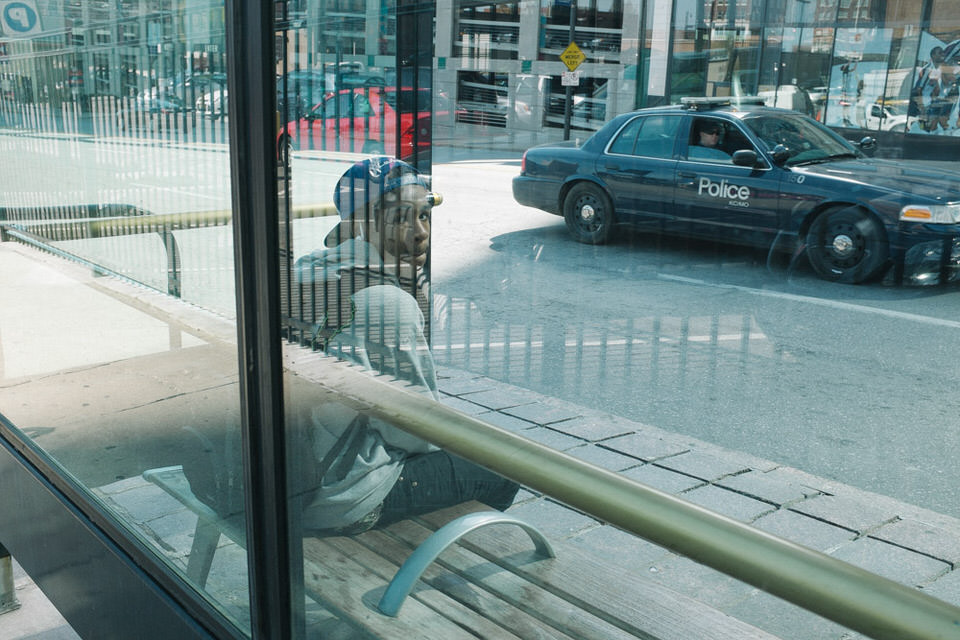
32) Shoot around bus stops and public transportation
In some mid-sized cities(especially American ones), It can be difficult to find people to include in your street photography. I think we’re seeing a resurgence of having an appreciation for downtown areas. But some cities can still feel like ghost towns at times when you’d expect to see people.
If you’re trying to photograph people, then one way of getting around this is to photograph at bus stations and other public transportation. These are people who are waiting for the bus or the train or whatever so they’re sitting or standing stationary.
Not only are there potential stationary subjects you can photograph, often times there will be multiple of them—which on some city streets you might only see one subject at a time.
33) Observe what’s around you when you’re not shooting
By this I mean when you’re just out and about without even having the intention to shoot street photography, just pay close attention to the scenes and the people and interesting things you see. In your mind’s eye, you can look at things the way you would frame them as if you were looking through a camera.
Take a subject or multiple subjects and adjust your angle of vision to have them composed in a way that would make a good photograph.
I used to play the drumset seriously and one of the drummers that I looked up to was Stewart Copeland, from the band The Police. I remember him doing an interview where he said that when he was learning the drums he would play a single stroke roll(the simplest drum rudiment there is) in his head while he wasn’t actually playing the drums.
The concept is the same here and it’s one that has improved my eye and just comes naturally at this point.
34) Practice leads to less fear
Taking street photography photos that include human subjects can feel pretty weird at first. But the important thing is the end results, so if you think the images you make are worth the slightly uncomfortable situations, then there really is nothing to feel guilty or scared about.
Regardless, that fear will creep in at times. But as you go down this path and the more and more you do it, the less fear you’ll have and the more comfortable you’ll feel.
35) Have some patience
Alex Webb’s quote on how street photography is 99.9% about failure is not an exaggeration. Becoming a good street photographer is just as much about what images you choose to display as the act of taking photos is. The images you decide to display in your portfolio or for publications should be the best of the best of what you’ve shot.
In other words, it takes a long time to make great images. If you get out there and pound the pavement and train your eye along the way the results should come. So having a lot of patience will help you get through the process and keep you motivated.
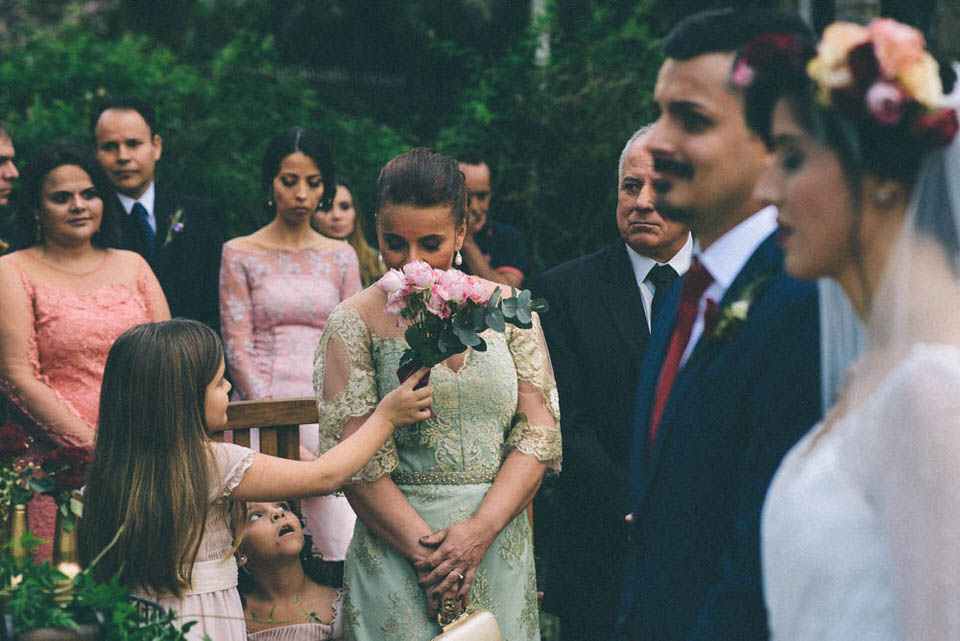
36) Look for facial expressions and gestures
The look on someone’s face or the way they move can be what makes a street photograph work; without some sort of emotional impact that comes from an expression, images can fall flat.
Street photography images can convey all matter of emotional feelings, whether that be happiness, sadness, anger, fear, or any other emotion. You can use that fact to create intrigue in your photos by shooting up close to show one or more subject who is expressing some sort of emotion or is doing some sort of interesting gesture.
With that being said, it’s not always the case that you’ll be able to pick out an expression or gesture among the subjects you’re photographing in real time. Probably in more cases than not, you’ll notice the images that have the most emotional impact afterward in the editing process.
37) Fake it til you make it, then decide your style
At the beginning (and at any point in your street photography journey for that matter), it’s perfectly fine and a good idea to emulate the style of street photographers who you admire. That’s how art has worked historically; the greats always derived inspiration for their work based on other artists who came before them.
Led Zeppelin, for example, developed their style by combining elements of rock, blues and jazz music that inspired them. They wore their inspirations on their sleeve and there’s no reason street photographers can’t do something similar.
The great thing about street photography is that even if you tried to copy a street photographer’s style exactly, it would be impossible. Street photography images show a moment in time that will never happen again.
So if you model your style based on the style of one street photographer that you admire, you’re forced to put your own spin on things.
38) Decide what isn’t your style
There are certain street photography styles and aesthetics that just aren’t going to be your cup of tea. You’ll probably refine this naturally over time but it’s also a good idea to make a mental note when you see street photography that doesn’t connect with you.
This way, you’re not out in the streets shooting in a style that you’re automatically going to reject right off the bat when you’re back in the editing process.
39) Discard the cliches
We all fall victim to shooting street photography cliches, especially when we’re just starting out. You might be at the point in your street photography when you wouldn’t know what a street photography cliche was even if you saw it because you haven’t been exposed to them enough.
There’s really nothing wrong with shooting street photography cliches per se, it’s just that ultimately they’re not interesting because they’ve been done to death and it just doesn’t add much to the street photography community.
Some street photography cliches may include:
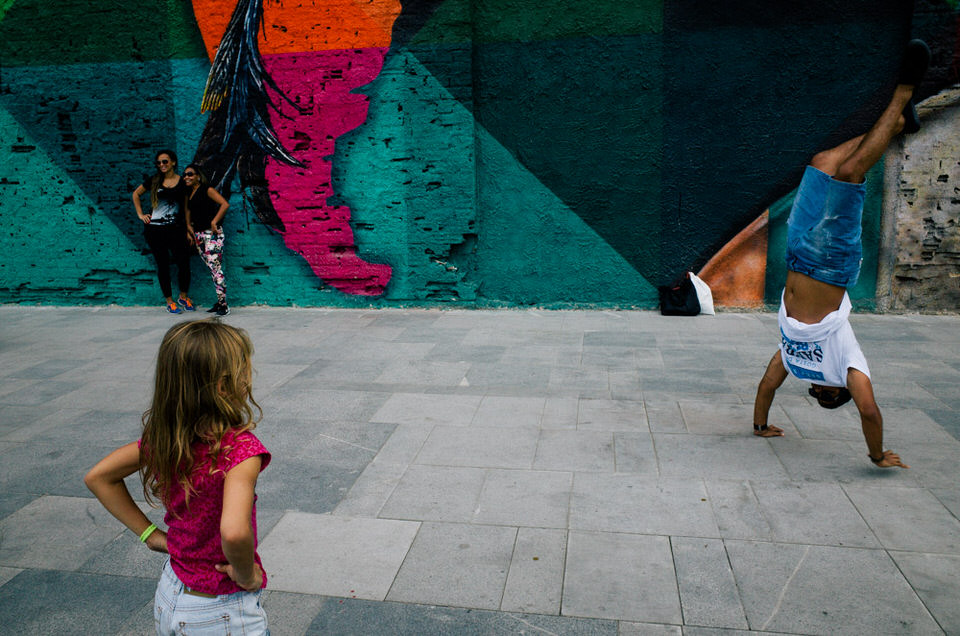
● Photographing one single person walking in front of a wall with graffiti on it
● Homeless people
● Reflections in puddles
● People using their cell phones
There are more street photography cliches than just this, but you’ll get a feel for what’s going to come across as cliche as you take in more street photography and shoot more yourself. This is not to say you can’t make great street photography images out of these scenes, but you have to work much harder and present them from a unique perspective to do so.
40) Use a light hand in the editing process
Street photography is much more about presenting reality in an interesting way rather than showcasing Photoshop skills. Just take a look at what happened with the Steve McCurry controversy. Yikes.(I still greatly admire McCurry’s work by the way.)
It’s fine to do the basics in Lightroom like make color corrections, adjust exposure/white balance, do some light dodging and burning and use certain presets but I just don’t see the point in making extreme alterations to street photography images. Reality is often stranger than fiction—why alter it?
41) Shooting weddings/events/journalism can help your street photography
When I was just getting into street photography, shooting weddings and events probably helped me more with my street photography than doing actual street photography. The photographer who I worked with as a second shooter was all about telling the story of the wedding day through multiple layers, and we would do it like this:
The point was to show not just interesting/intimate moments at weddings but to also try as much as possible to show it in relation to the bride and groom.
This helped to train my eye along with the fact that I could photograph people at will without them being suspicious of what I was up to; it was obvious that I was there to photograph the wedding. This gave me a lot of time to include anchor subjects in my frame and then keep my camera there until something interesting happened in a background layer.
42) Interact with your subjects
If you encounter a situation in which you’d like to include certain people as your subjects who you think may take offense at you photographing them, it doesn’t hurt to ask. The worst thing they can say is “no” and getting a denial is better than dealing with an aggressive confrontation.
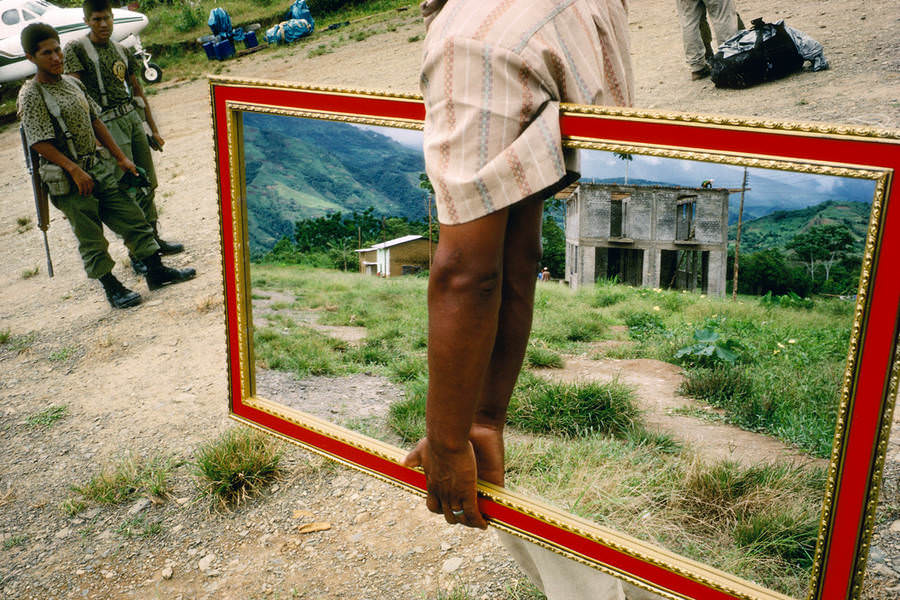
I’m thinking of people in the military, law enforcement, or people potentially doing something illegal like selling bootleg products. To use another example of Alex Webb, he stated in an interview that in certain situations, he would make friends with subjects so as to not encounter any nasty surprises when photographing certain people. He was speaking in regards to this photo:
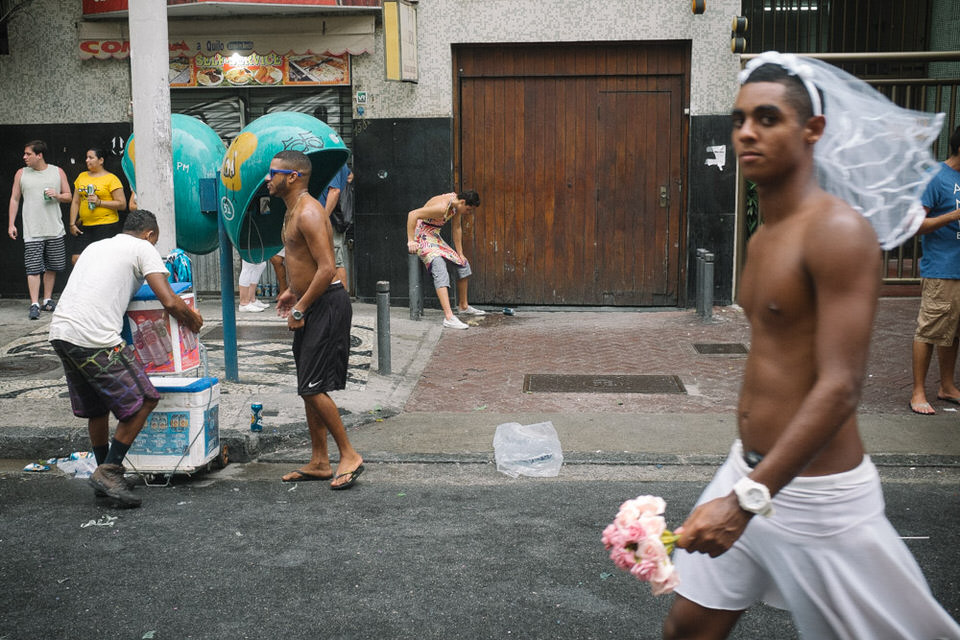
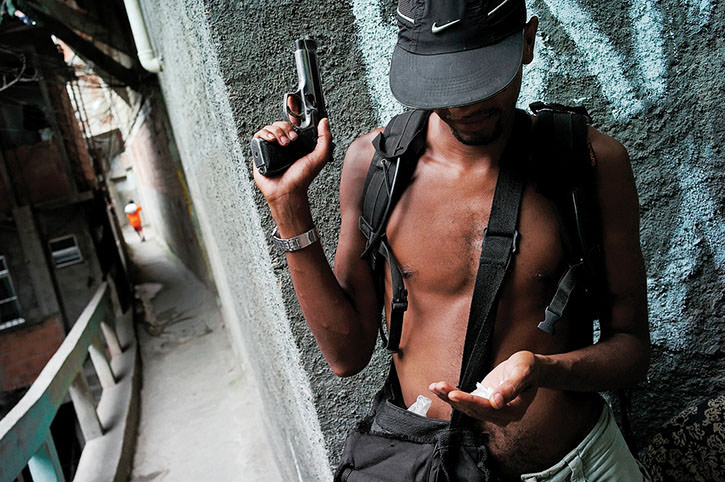
In a similar fashion, David Alan Harvey has said that he got this drug dealer’s approval when shooting this image in a favela in Brazil.
Another way to interact with subjects on the street is to take street portraits. I don’t do this personally so I don’t have any recommendations on it but I’ve seen some photographers do it very well, but keep in mind that’s veering into the territory of being a different genre outside of street photography. I think it can be used tastefully as part of a larger street photography project as well.
43) Make friends
One of the great things about street photography is that you end up meeting people that you otherwise wouldn’t have. That could be by joining a street photography meetup group, meeting your subjects(even more likely if you do street portraits), and just people you’ll meet because of being out and about rather than cooped up at home.
I struck up a conversation with this couple after photographing them.
44) Show a sense of space by shooting urban landscapes
Urban landscapes can be used as a compliment to more traditional street photography or as your bread and butter style.
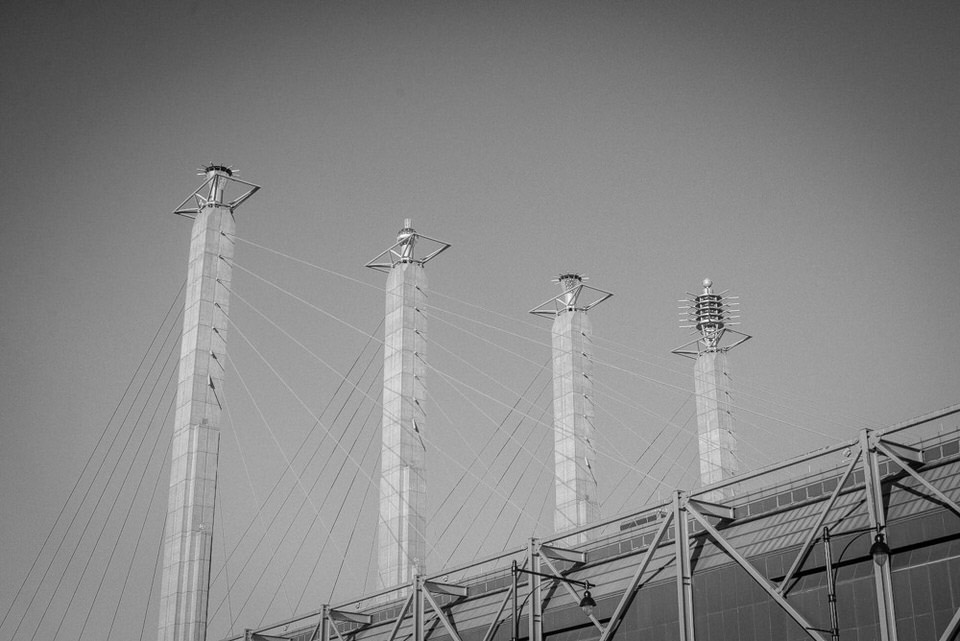
I think for street photography shot in project style(project meaning a group of images with a similar theme or shot in one place), it works well to pepper in cityscape/urban landscape shots to give viewers insight into what the city or place looks like more from a bird’s eye view. This gives context to street photography projects and breaks up the sequencing of images with a new and different perspective to keep things from getting too familiar/monotonous.
Urban landscapes can be a lot of things: city skylines, isolated buildings, or just combinations of a place and the objects that occupy it.
45) Make self-portraits
I haven’t done this but you can create a nice sense of time, place and authorship in your street photography photos by including yourself in them. You can use reflections in mirrors, puddles, glass and other reflective surfaces on the street to insert yourself into the scene.
If you’re curious as to how to do this, street photographer Vivian Maier(whose street photography work was discovered posthumously), was one of the masters of this style.
46) Some days you won’t make any good photos
In fact, there will be many days that you don’t come home with any photos worth keeping. That’s normal, and not something you should get discouraged about.
I mentioned it earlier but it bears repeating that 99.9% of street photography is a failure. Being a good street photographer means having the patience to wait for the next good opportunity to present itself and having the discipline to not display images that don’t make the cut. Know that if you put in the work, results will come.
47) It’s about the journey
With the sheer amount of bad photos that you’ll inevitably end up taking, it’s important to enjoy the journey while you’re on it and not be completely preoccupied with results. The good thing is doing street photography allows you to get out of your head and live more in the present moment. Instead of worrying about paying the bills or whatever, street photography entices you to take in all the sights, sounds, smells and feelings from the streets.
48) Have some humility
It can be difficult to look at our own work and try to be as objective about it as possible. Sometimes we get attached to our own work in a way that we wouldn’t if we were evaluating the work of another photographer.
So if you post your photo in a forum or group, expect to receive some constructive criticism. You may end up disagreeing in the end, but at least take it into consideration and don’t dismiss it outright.
49) Be brutally honest in your culling
Again, it’s all too easy to get overly attached to certain images that we’ve shot, especially if we feel that we had to go to great lengths to get a certain one. What we had to do before we pressed the shutter button isn’t what makes a great image though.
So try to be as honest as you can in your culling and get a second opinion when you’re on the fence if possible. If you shot a great image though, it should jump off the page when you’re deciding which images to keep and which to discard.
50) There are no rules
Everything here is just tips and suggestions. In the end, this is an artistic endeavor and you make the final calls for your personal work.
However, before breaking the “rules”, it’s important to essentially know them inside-out. Great music composers do this; they break the rules but only rarely when it makes sense to do so and they know that they’re doing it and doing it intentionally.
A good example is when classical composers started adding in dissonant-sounding tritones into their music when it made sense to have a creepy, tension-filled part of a song.
51) Have a website? Make sure it loads fast by compressing your images
If you showcase your work on a website and you’re trying to rank for any significant search terms, having a fast-loading site is important. Google has said publicly that page speed is a ranking factor. Your site should load preferably in under 3 seconds, but ideally even faster if possible.
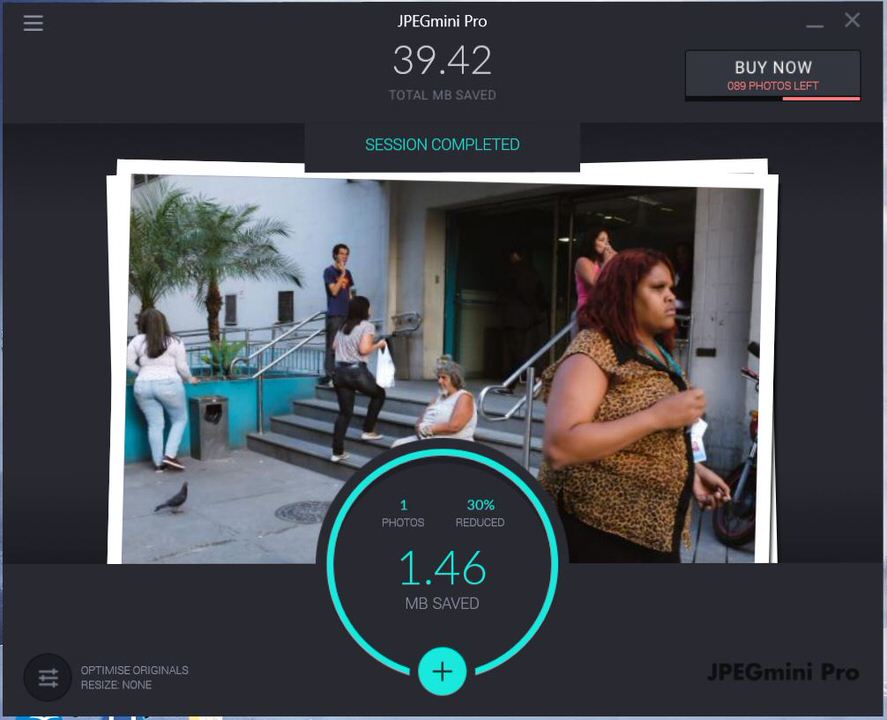
You can do this by compressing your images with JPEGmini. I usually get somewhere between 30%-60% reduction in file size, with no noticeable loss in image quality. For photography sites with a lot of images, that really adds up.
You can also use a lazy load plugin if you’re using WordPress, which makes pages load faster by making only the images above-the-fold load as the user scrolls down the page.
Closing Thoughts

Street photography may seem complicated and be intimidating at first, but as you go along you just start putting the pieces together. It is admittedly a very difficult genre of photography to do really well, but the challenge is part of what makes it so fun and interesting.
If you’re overwhelmed in any way about the tips here, there’s nothing to worry about. The first step is really just getting out there and doing it for yourself and seeing what works for you. You’ll end up internalizing these concepts along the way.