9 Must-Follow Product Photography Tips
Product photography is a wonderful genre of photography to be in and if this is an area you are thinking of getting in to or expanding upon, then below are a few considerations that you might want to look at. In this blog, I also take you behind the scenes of a shoot so you can see what is involved and how I accomplish a shoot from start to finish.
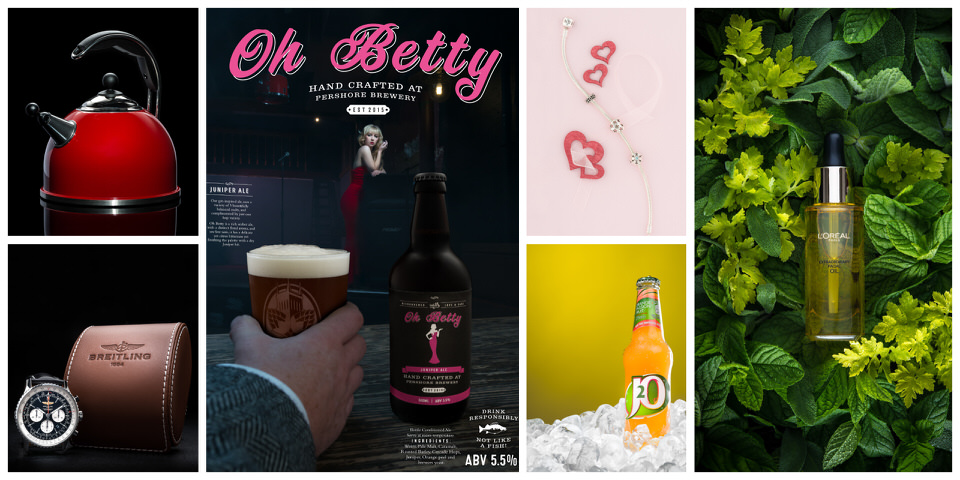
So, you’re a product photographer (or want to be); well that’s still a pretty broad term, which might be fine if you are finding your feet and haven’t decided on what genre you really want to specialise in, but I would suggest that you at least have a think about this to give your business some focus. Do you want to be an advertising product photographer or focus on commerce / clipped image products, lifestyle product, indoors, outdoors? The list can go on and on! There is nothing wrong with wanting to do several types of product photography but from a marketing point of view, it makes sense to focus on one area. This isn’t a photography thing, this is a business thing! If you want to be really successful then you need to apply this to your business. Just because you put it out there that you are specializing in, say, advertising photography doesn’t mean people won’t ask you to do other types of product photography work or even a totally different type of photography and you can decide if you take on those assignments or not. However, if you do, just don’t put them in your portfolio as it will dilute your marketing. I know this sounds difficult when you want to show the world everything you do, but it really will help. If you look at my website, although it’s aimed at the business market and it is fairly general, I’ve gotten around this by creating another website/brand which is targeted just at advertising. I was able to do this because I had a large body of work as well as several years’ experience within the industry. At the start of my journey into photography, I hadn’t honed in on what genre I wanted to do – if I was starting again, and knew exactly what I wanted to do, then I would just promote that.
Anyway, that’s the little business/marketing pep talk out of the way, let’s talk about an advertising shoot I did and how we did it.
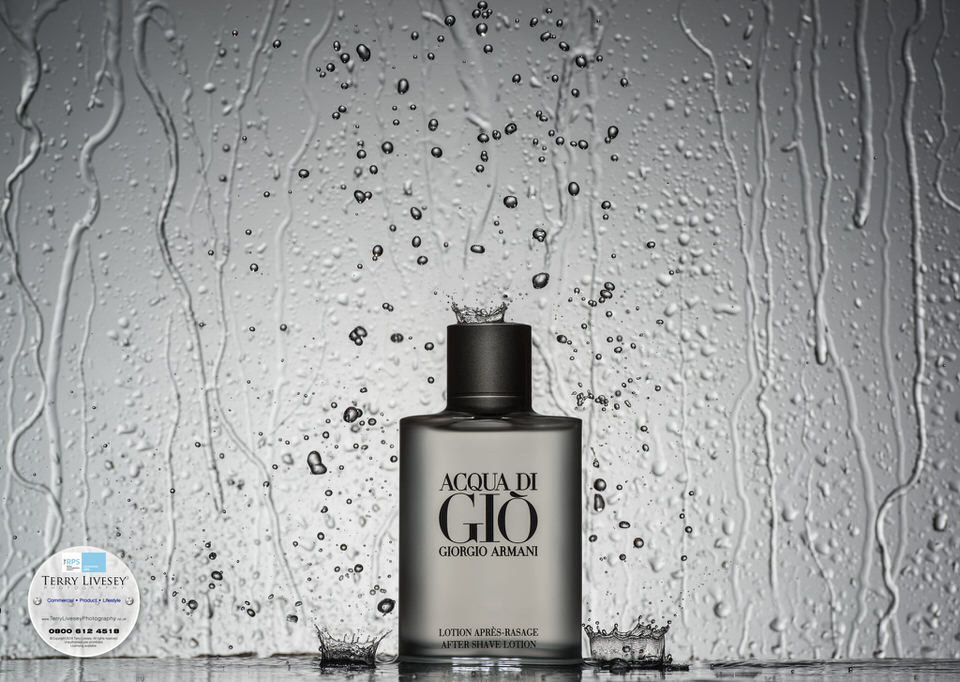
This set was all done in camera (touchups were done in Photoshop afterwards) which is how I like to work as this type of work is all about being creative and not just pressing buttons on a computer. So, what process did we go through to create this shot?
1. Brainstorming session / Creative session
This process can be as simple as chatting to come up with some ideas, to full-blown storyboards – it really does depend on what level your client expects or what you need to do in order to feel comfortable with the shoot. Always make sure you have written down the reasoning as to why the shot works with the product, i.e. it’s called Aqua so water was a natural choice.
2. Research to check the same shot hasn’t already been done
Once I have the idea, I always do a check to make sure that the product hasn’t been shot this way before or else I’m just going to look silly when I present it.
3. Prop list and planning
Create a list of props needed to complete the shoot and plan the dates in the diary as to who is doing what and when.
[Point 1 to 3 are normally all done at the same time]
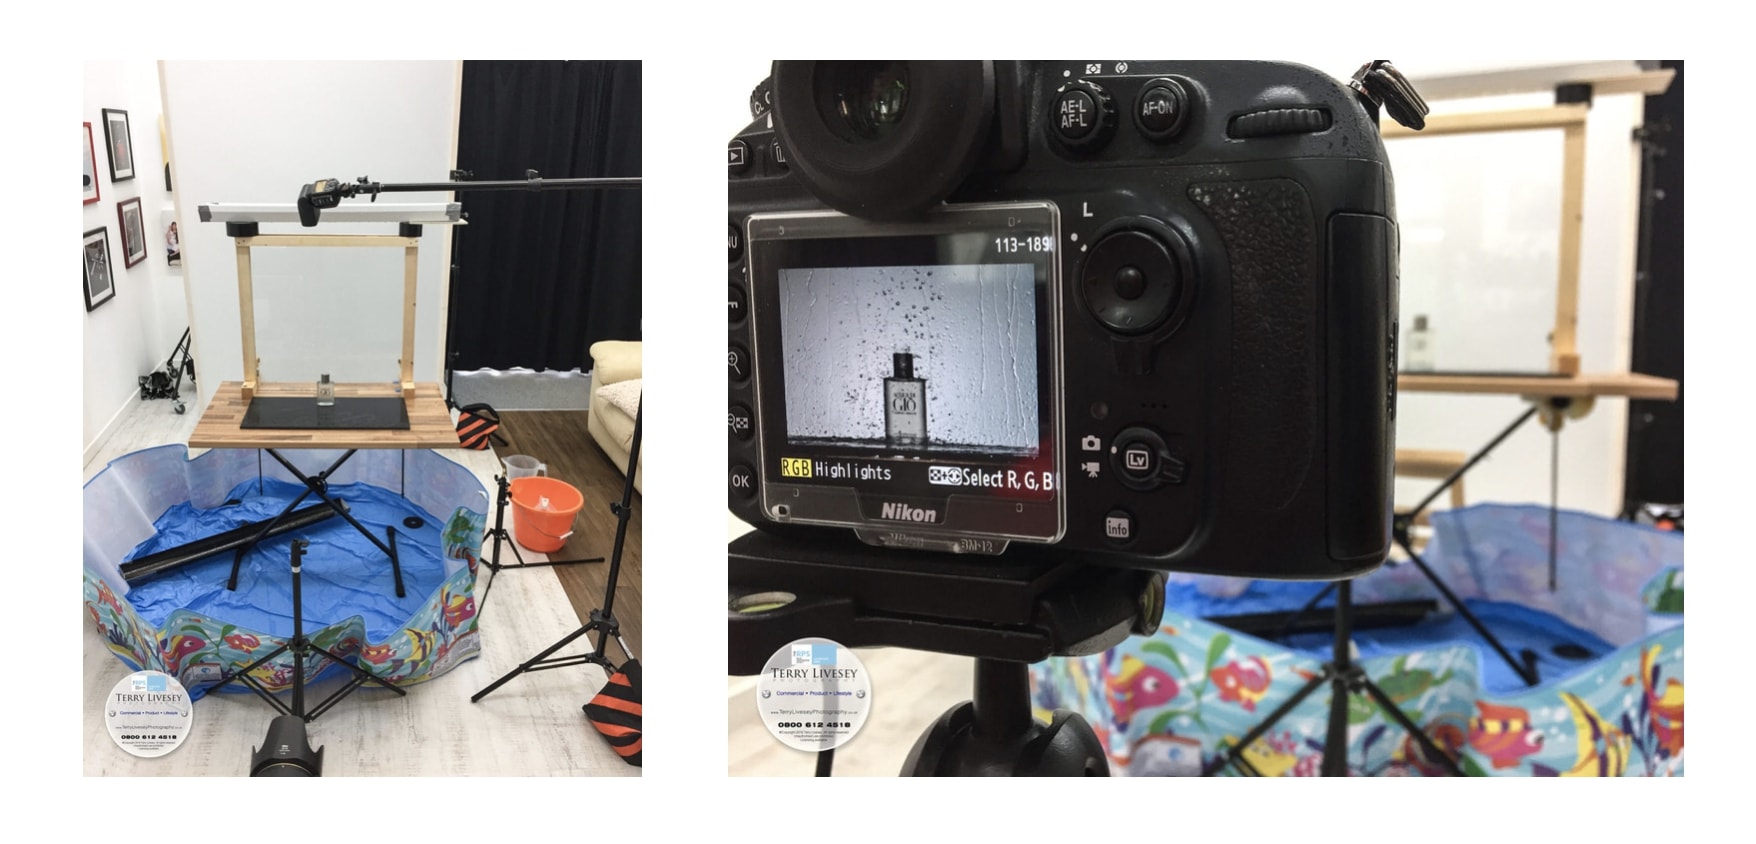
4. Set build
This isn’t always the case, but set-building doesn’t have to be the best DIY in the world, it just has to complete a function. Depending on the requirements, I will either create the set myself or employ someone else to do it. The requirement for this particular shoot was pretty simple really. It took me about an hour to make and it would have taken me just as long to explain it to someone else. You can watch a build of the prop below:
5. Pre-shoot checklist
Double check everything has been purchased, made, collected or is available, before the shoot as you just want to be creative on the day not panicking about finding something or creating unrehearsed set designs.
Try JPEGmini Pro For Free Now!
6. Shoot
Have fun! Everything is prepared (if you have followed the previous steps) so then you just need to work your magic with the lighting and camera angles and in this modern world of the digital camera, this makes it absolutely a breeze (oh, and years of experience in lighting tends to help as well!). One of the things which I always get is that feeling when I look at the shot on the camera and know that I’ve nailed it. Tip: even if you think you have ‘the shot’ when you look at the back of the camera, always, always go and look at it on the big screen and then go back, adjust what is wrong and continue. Repeat until it’s perfect.
7. Editing
You could be a photoshop whizz and have loads of editing to do or could just be doing final touch-ups to the image. Unless a client is chasing me for this, I always tend to leave it a couple of days so that I start to detach myself from the shoot. This is because when I have taken the shot and am happy with it, I think it looks perfect, but after a couple of days I’ll notice the odd bit of dust or that the colour could do with tweaking a little or I don’t like a certain run of water, for example, because it’s distracting.
8. Delivery
Delivery these days is all digital and I always present the client with two versions of every image that they use: a low-res version for email, web, social media and a high-res for print. When it’s for an advertising client, the high-res version is always in tiff format as their editors will then continue with the modifications I have done for their own purpose and it will keep the image in a lossless format.
Now, for the low-res version, I always export it from Lightroom using jpeg mini and I do this for a couple of reasons: I always embed metadata into the image and by using jpeg mini I get the perfect file size with no loss of image quality or artifacting. This means that web developers don’t bother to re-encode the image because they just can’t get the file size any smaller without degrading the quality drastically and they never like to do that. Tip: always put all your contact and copyright information in the metadata, but also put the title and describe the image in the caption. Advertising clients might not use it but general business clients will and it will give them kudos across the internet as they use the material because Google uses these fields to help it list images within its directory.
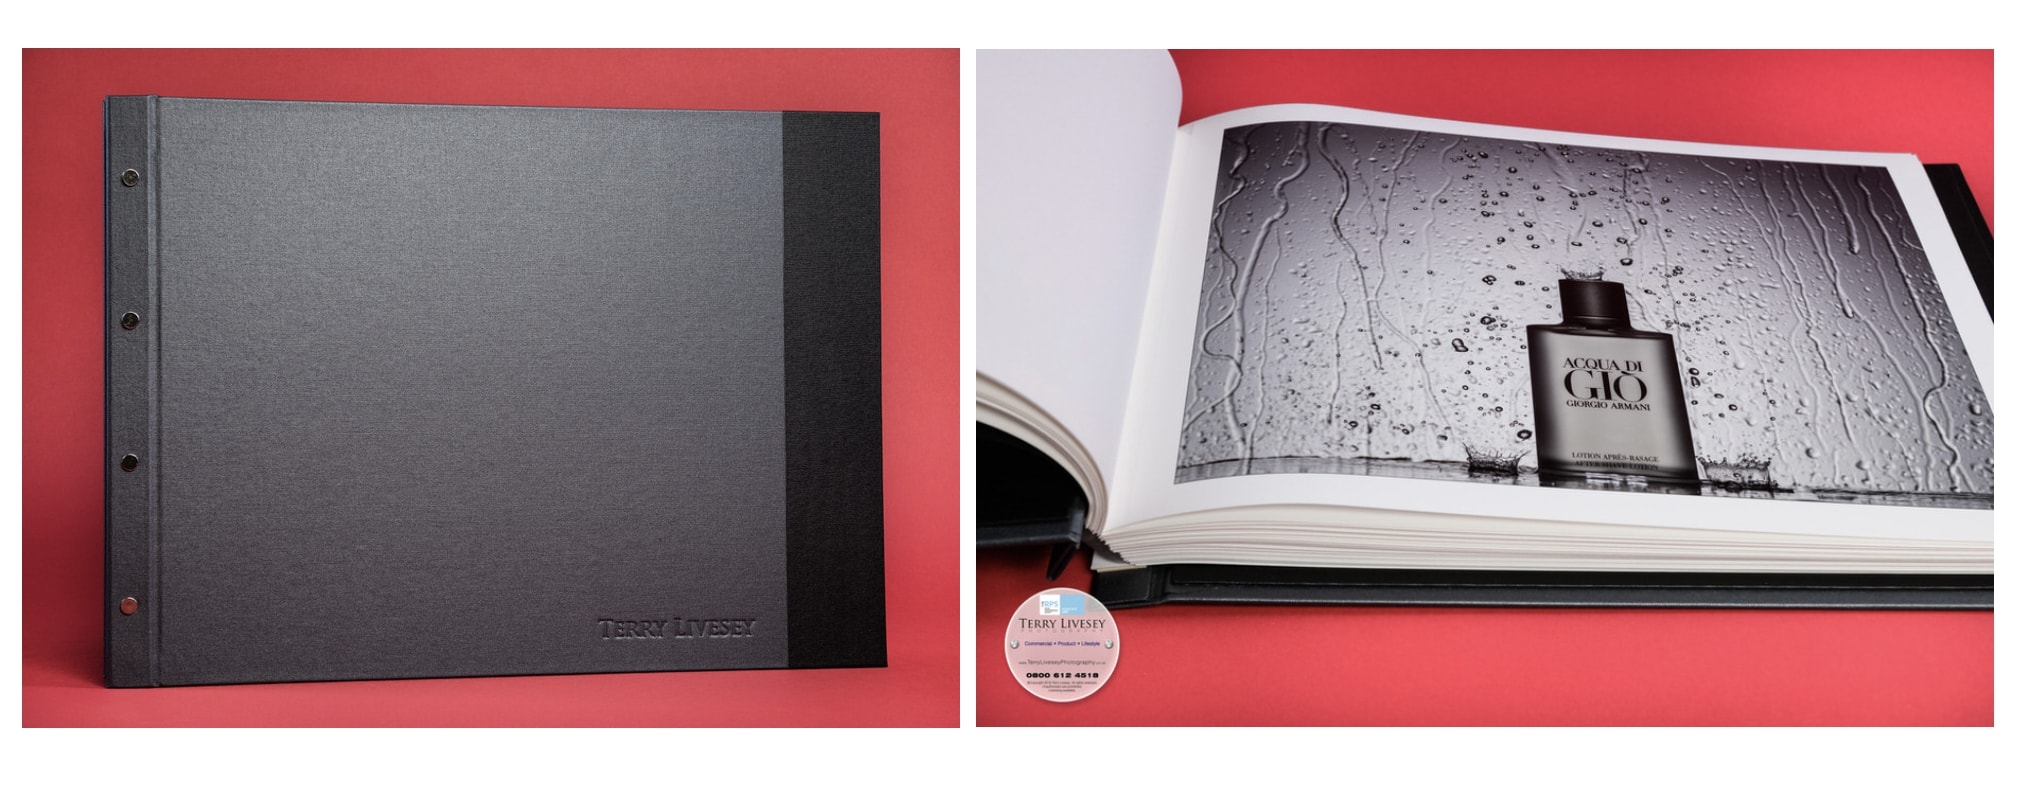
9. Portfolio print
If you are super happy with your image, do a portfolio print straight away … you do have a portfolio, don’t you?
So, from this list, I hope you can see that quite a lot of work goes into creating a shot like this. But then, creating something successful does usually require effort!