
Up Your “Getting Ready Photography” Game Today (for $4.09) … No Workshop Required!
How about a quote? It’s good to start out with a quote when you’re blogging for a legit ‘site for the first time, right? Maybe not, but we really like this quote from Dorthea Lange because it connects with us and our photography: “Photography takes an instant out of time, altering life by holding it still.” We actually really, really like it. It’s why we take pictures: to capture time; to immortalize a moment or an emotion; and to document an event that’s so special that someone hired us to capture it.
And that’s probably why we love wedding photography. It’s the best moments, the greatest emotions, and loads of different personalities all mashed up together as a couple celebrates their best day ever.
But let’s talk about that $4.09, which is likely why you clicked on this post. We recently led a photo walk at WPPI 2017 and demonstrated some of the techniques we like to use when we photograph our couples as they get ready for their weddings. It’s easily one of our favorite parts of a wedding day, and we don’t shirk away from creating art in those moments. Why? Well, we specifically want to create art for our couples because we want them to print photographs in an album and hang photographs on their walls.
Now, because we are full-time wedding and portrait photographers, parents of five children, homeschoolers, and business owners (and the list goes on, right?), we don’t always have time to fly off to a workshop or convention or tradeshow to learn about new lighting techniques, the latest and coolest gear, or whatever. Sound familiar? Even if it doesn’t, we thought we’d hook you up right now with some inexpensive options—“tools” you can grab fairly easily and pretty much use right away. It’s how we’ve taken our getting ready photographs to radder levels over the last several years.
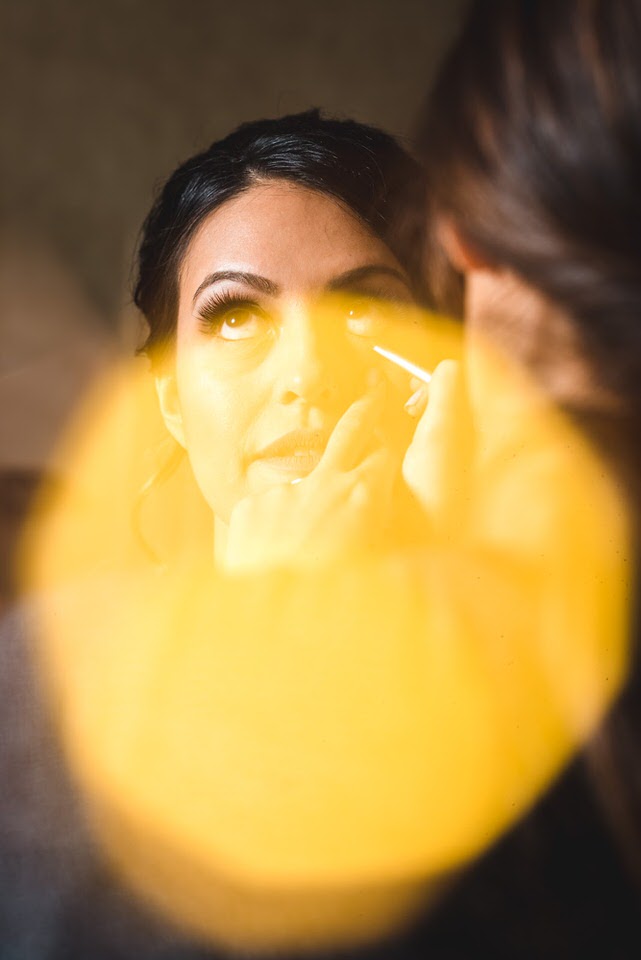
We Use a Prism
Very often, we’ll use a prism when we photograph our couples getting ready. We use this prism and keep it accessible throughout the wedding day; it’s often in Andy’s pocket, in fact. But a prism really does take at least some regular use and practice, and you may not have the time, on your next wedding day, to experiment. So, if you do buy one, you’ll need to take some non-wedding time to figure out how to use it and see how some of your photographs might turn out once you master it. Plus, it costs a bit more than $4.09.


We Use a Convex Lens
We also use a convex lens. In particular, we use this convex lens; unfortunately, they haven’t been available online for at least a year. Word on the street is that you can get them at a science supply store, if you have one in your ‘hood. We use them for all kinds of things, like macro photography and also adding bokeh and haze to photographs, especially when photographing the details. It probably isn’t something you’ll add to your kit immediately because, like the prism, it takes a bit of practice. And it’s tough to find one … and they generally cost a bit more than $4.09.


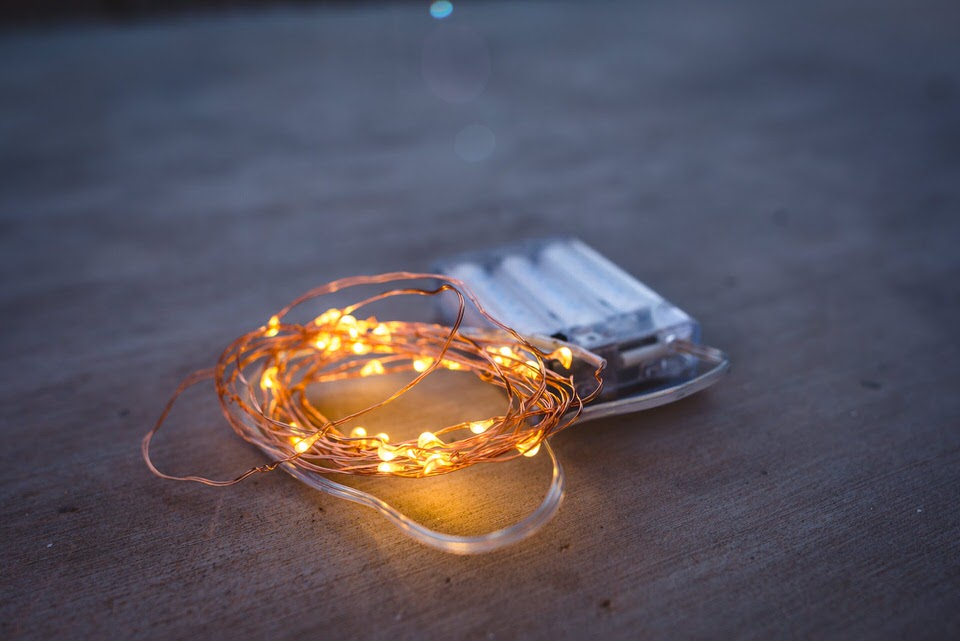
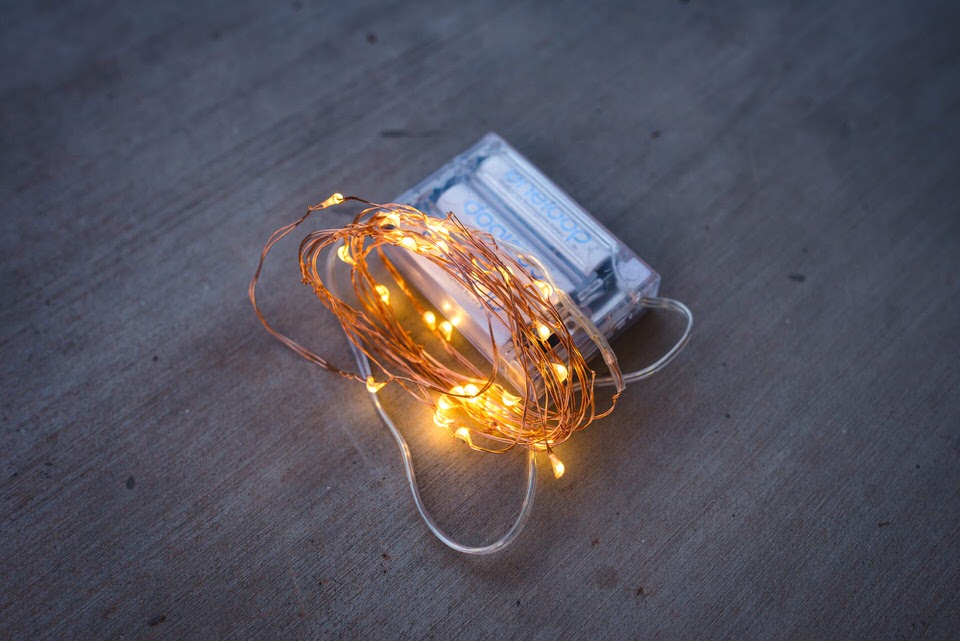
We Use LED Lights … And So Can You (Today)!
Here’s an easier route for creating artistic getting ready photographs. Buy a small string of LED lights. It’ll set you back less than five dollars, exactly $4.09 (if you click that link and if the price hasn’t gone up).
And here’s how you use ‘em:
1. Pop some AA batteries in it; we use Eneloop AAs because, well, we already have dozens in our kit.
2. Turn on the lights and hold them in front of your lens (Live View would be the preference, btw). Instant bokeh. Instant art.
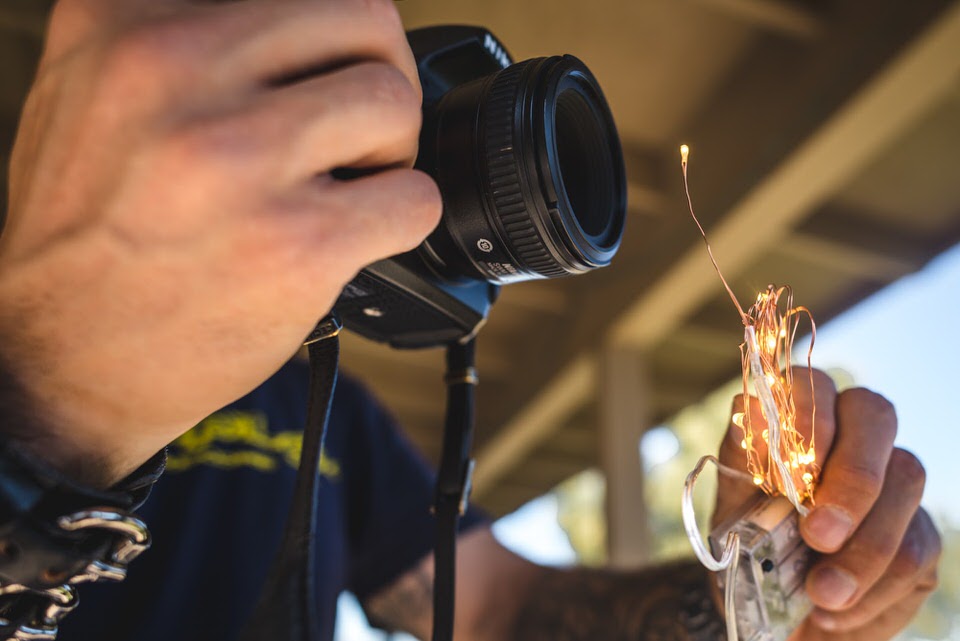
3. Have fun. Yep. You should practice a bit and figure out the difference in using one light versus a few of the lights on the string. Plus, we all know that practice makes perfect. But it really is as simple as holding the lights in front of your lens. And see what you can come up with.


Conclusion
We want our couples to take their images off the screen and display them around their homes. We want people to stare at the canvas of their loved ones as they walk out the door on their way to work, so they are constantly reminded of how much they love them.
And while it’s fun to grab a prism, convex lens, or even that $4.09 string of lights, it’s most important to make solid connections with the people you photograph. So, after reading this post, please don’t throw LED bokeh in every getting ready shot you take, as a “fun surprise” for your bride. Start out with a few photographs and take it from there. And have fun, because if it’s not any fun, well …
—
All images by Andy & Amii (rad wedding & portrait photographers, who own Sunshine & Reign Photography) are copyrighted and have been used with permission for JPEGmini. Do not copy, modify, or re-post this article or its images without express permission from JPEGmini or Andy & Amii. (Share the heck out of it on social media though!) You can also check out more of Andy & Amii’s work on Instagram. Yeah!