What You Can Learn From My Bracketing Techniques
I shoot on location a lot. 99% of the time I’m outdoors, in a dive bar, or maybe a swish hotel. Traveling light quickly becomes a priority, and getting from the car to the location in one trip is the first victory of the day.
High production value is critical to my aesthetic as a photographer. This means a lot of effort goes into every element of the shot. From the location scouting, styling, hair & makeup and that’s all before my camera is out of the case. Having control of the light is essential for me to make the most of all this hard work.
Up until about 18 months ago, I was a committed Profoto fanboy. As far as I was concerned their equipment was without equal. I was lugging around a battery pack and head, and a mains generator and 3 heads for that. It worked but it was bulky and time consuming to move around. Then I discovered Godox and their lithium-ion powered Speedlite. It seemed like a genius idea so I bought one to try out. Very quickly this replaced my Profoto, battery pack. I bought two more and I haven’t looked back since. The Li-ion power allows for higher output and much faster recycling times compared to AA batteries.
Try JPEGmini Pro For Free Now!
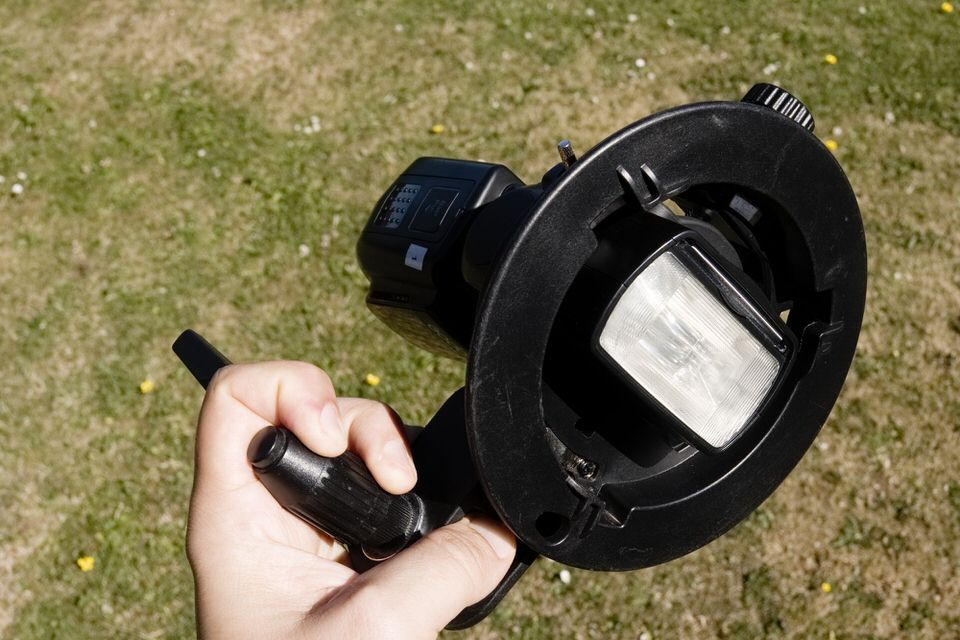
The real key to being able to make what looks on paper to be an impossible switch besides the genius of a Li-ion Speedlite is the s-mount bracket. This is a simple $20 bracket for your Speedlite that allows you to mount Bowens and third party s-mount light shapers on your speed light. As well as Magmod shapers, which if you haven’t tried, you must.
The Li-ion power, combined with the s-mount bracket was a total game changer for me. It has allowed me to massively reduce the bulk of my lighting kit and increased flexibility dramatically. I have studio quality light wherever I go and whatever light shaper I need. Whereas before my lightweight kit was one bulky Profoto battery pack, now its three speedlites in my camera bag.
The flexibility of having three flashguns to hand, especially when indoors is invaluable. Allowing me to add depth with a light far off in the background, or a hair light if required, all in addition to my key.
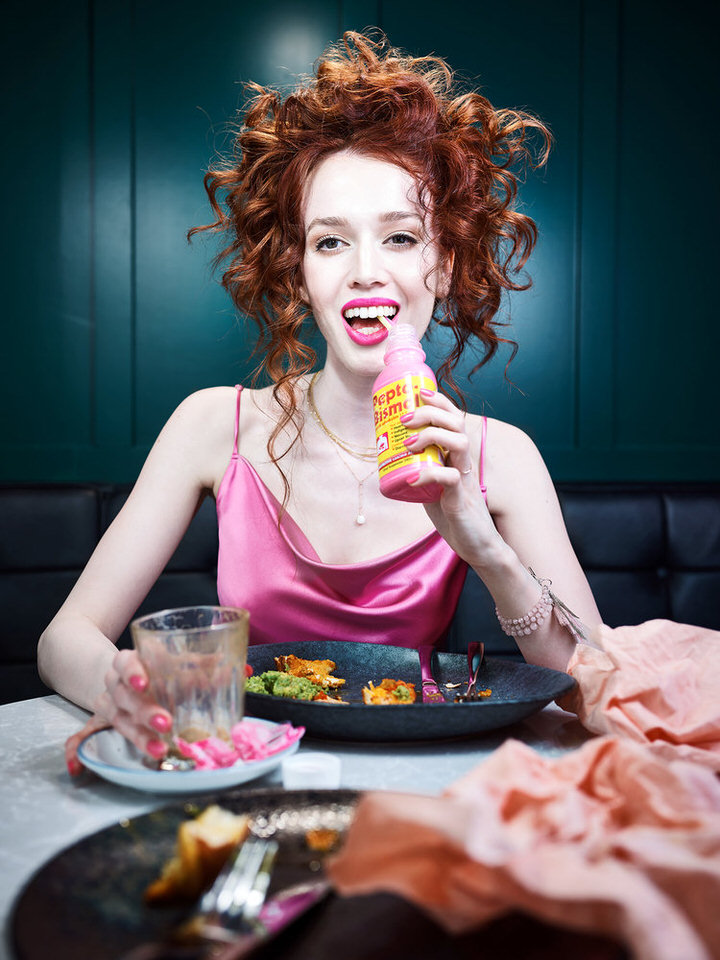
This shot was lit with two speedlites, the key on the model is a 4’ Octa w/ grid, and there is a bare speedlite bouncing off the ceiling in the background.
This was shot with four speedlites, one spacelight either side of the camera at equal power, a fresnel directly above the lens fo specular fill, and a Magmod Magsphere above model as a hair light.
This was with one speedlite, with a Magmod Magmask mounted on the front.
So what happens when its sunny, Gav? Well – Sure you are at the limit of your power here. My own preference is to use a fresnel (Aputure and Magmod both make great options). Another option is to mount two or 4 speedlites together along with an umbrella of your choice and use this as if its a single light. This works a treat – I just prefer the look of a fresnel.
These simple steps have made a big difference in how I shoot, and how much I enjoy shooting. It’s faster to get in and set up on location, and I can spend more time thinking about the work I want to do. One downside I must admit is the lack of modeling lights so this may not be for everyone. For me, the added portability and speed is worth it and I keep a small LED panel in my bag to help with focusing when I need it.